June 24, 2026 • Darius Mosley • 9 min reading time • Prices verified June 29, 2026
Building a Home Lab Rack: Cabinets, Patch Panels, and Structured Wiring Done Right
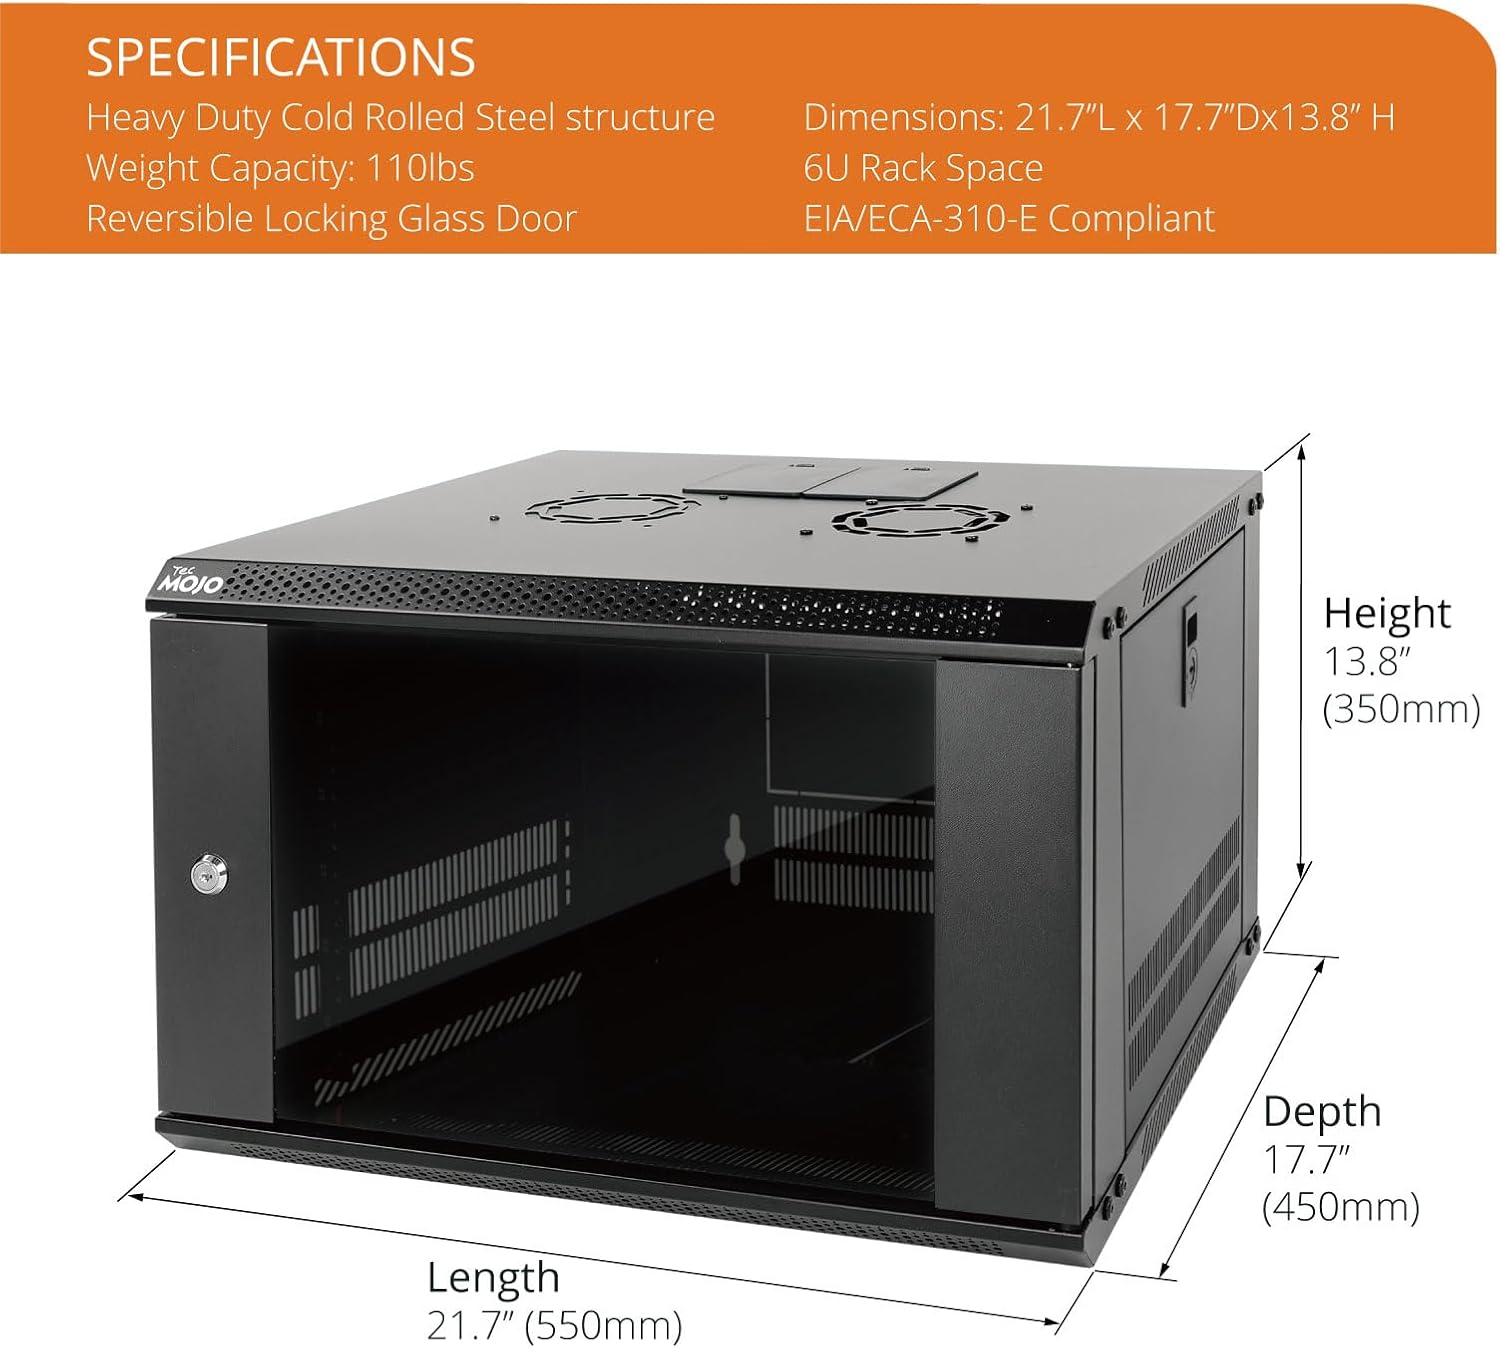
If you’ve ever looked at a tidy wall of blinking switches and color-coded cables in a server room and thought “I want that in my house” — you’re not alone, and you’re not crazy. A home lab rack is essentially a dedicated, organized cabinet (the metal or steel enclosure that holds all your networking gear in standard-sized slots) that keeps your router, switches, patch panels, and other equipment in one place, properly ventilated, and easy to manage. Instead of a nest of cables behind your TV stand, you get a system that’s legible, scalable, and — genuinely — faster to troubleshoot at 11 p.m. when something breaks. This guide walks through cabinet selection, patch panel strategy, and structured cabling (the practice of running permanent, labeled cable infrastructure through your walls and ceiling rather than stringing long Ethernet cables across the floor) so you can build something you won’t have to tear apart in eighteen months.
Cabinet Selection: U-Space Is the Whole Ballgame
Everything in a rack is measured in “U” — rack units — where 1U equals 1.75 inches of vertical space. A router might be 1U. A 24-port managed switch is typically 1U. A patch panel is 1U. Your UPS (uninterruptible power supply, the battery backup that keeps everything running through brief outages) might be 2U or more. Before you buy a cabinet, you need a rough inventory of what’s going in it — and then you add 30–40% headroom for growth, because you will add things.
Common home lab cabinet sizes and their practical fit:
| Cabinet Size | Usable U | Realistic gear count | Best for |
|---|---|---|---|
| 6U wall-mount | ~5U usable | 1 switch + patch panel + router | Apartment, single-floor homes |
| 12U wall-mount | ~10U usable | 2 switches + patch panel + UPS shelf | 2–3 bedroom home, starter lab |
| 22–24U floor-standing | ~20U usable | Full stack + UPS + cable management | Serious home lab, SOHO |
| 42U full-height | ~38U usable | Multiple switches, servers, full UPS | Dedicated room builds only |
For most enthusiast home builders, a 12U wall-mount is the sweet spot for a first build. It keeps the footprint small, installs cleanly in a closet or utility room, and gives you room to grow. Owners who went straight to 6U consistently report regretting it within a year — the math on U-space fills up faster than it looks on paper.
Open frame vs. enclosed cabinet: An open-frame rack (no side panels, no doors) is cheaper and easier to work in but offers no physical security, no dust management, and louder ambient noise. An enclosed cabinet with a perforated door and side panels costs more but keeps cable runs cleaner, reduces dust accumulation on gear, and lets you install blanking panels (the plastic or metal covers that fill empty U slots — critical for directing airflow over your equipment rather than letting it short-circuit around gear). For a home environment, the enclosed cabinet is almost always worth the premium. Ars Technica’s home network build guides consistently note that airflow management in enclosed cabinets pays off in equipment longevity, especially for gear without active fans.
Depth matters more than most buyers expect. A standard 19-inch wide rack accepts 19-inch rackmount gear universally, but depth varies from 18 inches to 36 inches. Prosumer switches like the Ubiquiti UniFi Pro 48-Port PoE run around 17 inches deep, and once you add cable management arms and rear cable routing, a 24-inch-deep cabinet gets tight. Target 24–30 inches of internal depth minimum for a multi-device build.
Patch Panels: The Architectural Decision You Can’t Easily Undo
A patch panel is a passive (unpowered) termination block mounted in the rack where all your permanent in-wall cable runs terminate. Instead of running a 50-foot cable directly from a wall jack to a switch, you run cable to the patch panel, then use short patch cables (typically 1–3 foot “jumpers”) to connect specific ports to the switch. This architecture is foundational to structured wiring — and the reason you can move a device from VLAN 10 to VLAN 20 at the switch port level in about 15 seconds without touching a single wall cable.
Keystone vs. 110-punch-down patch panels: The two dominant formats for home and SOHO use have a real tradeoff.
- 110 punch-down panels (the traditional format) require a punch-down tool to terminate each conductor into an IDC (insulation-displacement connector) block. They’re inexpensive per port and extremely reliable when terminated correctly. The downside is that re-terminating a port is a deliberate act — you’re committing.
- Keystone jack panels use modular keystone connectors (the same snap-in jacks used in wall plates) that you terminate separately and snap into the panel. They’re more flexible for a growing build — you only populate ports you’re actively using — and individual ports can be swapped without disturbing neighbors. SmallNetBuilder’s structured wiring coverage notes this format has become the dominant choice for home builds precisely because of that modularity.
For most home lab builders in 2026, a 24-port keystone panel is the right starting point. Even if you only have eight cable runs today, you have room for 16 more without buying new hardware.
Cat6 vs. Cat6A — make the call once:
This is the decision that determines your ceiling for the next 15 years. Published TIA-568.2-D standards (the industry spec document that governs copper cabling performance) specify:
- Cat6: Rated to 250 MHz, supports 10GbE at runs up to ~55 meters (about 180 feet). Sufficient for 2.5GbE and common 1GbE home use.
- Cat6A: Rated to 500 MHz, supports 10GbE at the full 100-meter (328-foot) channel length. Substantially heavier, harder to pull through conduit, more expensive per foot — but future-proofs the physical layer.
The tradeoff isn’t really about today’s speeds. It’s about wall access. Once cable is in the wall and terminated, the cost to replace it is almost entirely labor. If your home has open-wall access (renovation underway, unfinished basement ceiling below the first floor), pull Cat6A. If you’re fishing cable through finished walls, Cat6 is often the pragmatic call — you’re unlikely to exceed 55-meter run lengths in a residential build, and 10GbE at that distance is well within spec.
Flag for multi-gig buyers: If you’re on a multi-gig fiber plan (2.5Gbps, 5Gbps, or 10Gbps) — increasingly common in 2026 as ISPs expand their fiber footprints — confirm your router’s WAN port can actually receive that throughput. A router with a 1GbE WAN port fed into a 2.5Gbps fiber circuit is a common and expensive misconfiguration. PCMag’s switch and router coverage consistently flags this as one of the most frequently overlooked buyer mismatches in the prosumer segment.
Structured Wiring: The Runs, the Labels, and the Cable Management Religion
Structured wiring is a system, not a collection of decisions. The discipline is: every permanent run goes from a wall jack to the patch panel, every run is labeled at both ends before it’s ever terminated, and nothing in the rack is “temporary.”
Planning your runs:
Start with a floor plan and mark every location where you want a wired connection — office desk, living room media cabinet, bedroom access point mounting location, security camera positions, and the rack location itself. Each location gets one or more runs of cable back to the rack. Best practice from TIA-568 is to home-run every cable individually back to the patch panel (star topology — each jack has its own dedicated cable to the panel) rather than daisy-chaining jacks. This ensures each port gets full switch bandwidth independently.
The labeling rule that saves you six months of frustration:
Label every cable at both ends before you pull it — with a permanent marker on the jacket or a printed label sleeve — using a consistent scheme you’ll understand in three years. A simple scheme: room abbreviation + jack number (e.g., “LR-1” for Living Room jack 1, “OFF-2” for Office jack 2). The same label appears at the patch panel port and on the wall jack. When a port goes down at 11 p.m., you know exactly which run and which room without a cable tracer.
Inside the rack — cable management is not optional:
Horizontal cable managers (1U rings or troughs that route patch cables horizontally across the rack face) and vertical cable managers (mounted on the rack sides to guide cables up and down) are the difference between a rack you’re proud to show someone and one you avoid opening. The investment is modest — a pair of horizontal managers for a 12U rack runs $20–40 — and the payoff in serviceability is significant. Owners who skip cable management in early builds almost universally report retrofitting it later, which is more painful than doing it upfront. Tom’s Guide networking coverage notes that this is one of the most common “do it right the first time” regrets in home lab builds.
Power and UPS placement:
Mount the UPS at the bottom of a floor-standing rack (weight distribution) or budget it on a dedicated shelf in a wall-mount cabinet. A basic 1500VA UPS spec-rated for ~900W output runtime gives most home lab stacks — a managed switch, router, patch panel, and a couple of access point PoE draws — 15–30 minutes of bridge time through a power event. That’s enough to finish a remote work call or let a NAS complete a write cycle cleanly before shutdown.
The “If X, Then Y” Decision Frame
You’ve read the tradeoffs. Here’s how to close the decision:
If your home has open-wall or renovation access right now → pull Cat6A, full stop. The labor window won’t come back cheaply.
If you’re fishing cable through finished walls in a house you’ll live in for 5+ years → Cat6 is defensible, but spec your switch and router for multi-gig (2.5GbE minimum on all uplinks) to avoid a WAN bottleneck.
If you’re on a budget and starting small → 12U wall-mount + 24-port keystone panel + a 16-port managed switch is the stack that scales. You can add a second switch via an uplink port before you ever need a larger cabinet.
If your gear inventory already exceeds 10U or you’re adding server hardware → start at 22–24U floor-standing. The delta in cost between a 12U and 22U cabinet is small relative to the rebuild cost of swapping enclosures in 18 months.
If you’re on multi-gig fiber (2.5Gbps+) → verify your router’s WAN port speed before anything else goes in the rack. A mismatched WAN port is the most expensive invisible problem in the home lab segment, and it’s fully avoidable at purchase time.
The rack is infrastructure — treat it like the foundation, not the furniture. The decisions you make in the wall and the cabinet today determine what you can do at the switch port level for the next decade.